
Find a Single Cable. I dare You.
Manage your cables or they’ll manage you. A lil look into how I cable manage my Mac Studio setup.
From an early age, my parents instilled an abhorrence of visible cables. I can remember them doing everything in their power, including squeezing cables between the floor and baseboards (probably not safe) to snake a wire around an entire room and to its destination sight unseen. Christmas was worse, when tree decorating consisted of an unhealthy amount of time tucking the lights around and underneath branches so that no single part of a cable was visible. Again, I cannot stress my family of origin's incredible distaste for visible cabling.
I didn't escape this fate. There must be a genetic component because I've always been a little obsessive about ensuring cables remain as discrete as possible. Thankfully my condition developed to be a little milder.
When I began setting up my Mac Studio and display, I was challenged with hiding as many cables as possible. When I had my iMac, it was easy, one cable, but when it came to the Mac Studio, the challenge became worthy of a short post.
The added desire to hide cabling is because of the visual clutter it produces. The space where this desk resides is under 100 square feet but also houses our tech storage, bookshelf, couch/pullout bed, and a growing collection of plants. Keeping the area minimal aids in keeping the space feeling as large as possible.
Process
With no backing behind the desk except a thin 1.5-inch wood frame, I needed to think of clever ways of hiding over 30 feet of cabling as discretely as possible. My recently installed cable box is visible on the left.
As you can see from my setup, I have no backing behind the desk to hide my cables and very little structure to hide any of my cables behind. The desk, the Blum desk from a Canadian outfit called Structube, offers just 2.5-inches of depth from the top of the desk to the bottom to obscure all my cables. And in that precious little space, I have to hide:
6ft Braided Mac Studio power cable
6ft Braided Studio Display power cable
3ft Braided Thunderbolt 4 cable
2 Braided Lightning cables (3-feet each) & wall warts for my HomePod minis
Samsung SSD (for backups) & its short USB-C Cable
Surge protector & excess cord (~ 4 feet excess)
Phillips Hue Lightstrip, huge adapter, & 8ft of cabling
Before the SSD and Lightstrip, I managed to tuck and snake all of these cables down the table's left back leg and have them connect to a surge protector hidden behind the horizontal beam at the bottom. To guide the lines, I turned to my favourite of all inventions: 3M Command Outdoor light clips. These translucent clips securely affix to furniture and provide the structure that allows me to guide most of my cables down. When I first got the Mac Studio, the cables increased such that I couldn't secure all of them with a single clip (collectively, they were too thick). I added a parallel channel alongside my original to guide the new cables down the same leg.
And to manage any extra length of the cable before they travelled down the desk, I again turned to the 3M clips and Velcro strips to bundle and bowline the excess cables effectively.
That all worked flawlessly up until I got the Hue Lightstrip. The extra hardware and cabling finally required me to rejig my entire setup; I couldn't hide the pieces behind the beam of the desk and needed to opt for a cable tray to conceal the growing bundles of cables and plugs. Fortunately the overhang of the white desk helps to perfectly obscure the light strip running around the desk, making it invisible from every angle.

The picture above shows the cable management inside my janky plastic cable box before upgrading to a metal one for more structure and vertical space. From left to right: Phillips Hue & Surge cords managed with velcro, massive Hue wall wart, HomePod mini plugs/adapters (blue cabling organized with velcro strips), Mac Studio, & Studio Display.
I first opted for a white plastic cable tray that I could screw into the bottom of the desk. This helped hold all my cables, but the weight of the various plugs began to bend the cheap plastic tray I had purchased. Additionally, the height of the tray was short to the point of bending the cables (best seen on the HomePod mini cable), so I upgraded to a taller metal C-shaped tray that allows cables to enter from the sides and back but hides everything when viewed head-on.

In the photo above, you can see the Phillips Hue Lightstrip & cable running around the edge of the desk and into the white cable box. Additionally, you can also see the power cord from the surge protector coming out of the cable box and running vertically down the back of the leg and into an outlet below.
Everything else remained the same; I redid my clips to help guide the cables into the tray and now have a setup that, from nearly any angle inside the office, conceals all the wiring. Integrating technology into small spaces while making the areas feel beautiful and organic is not always easy. Hiding cables can become a small project to help a room feel lighter and remove visual clutter.
FAQ
What desk is that? $219 Blum desk from Structube (might be gone soon)
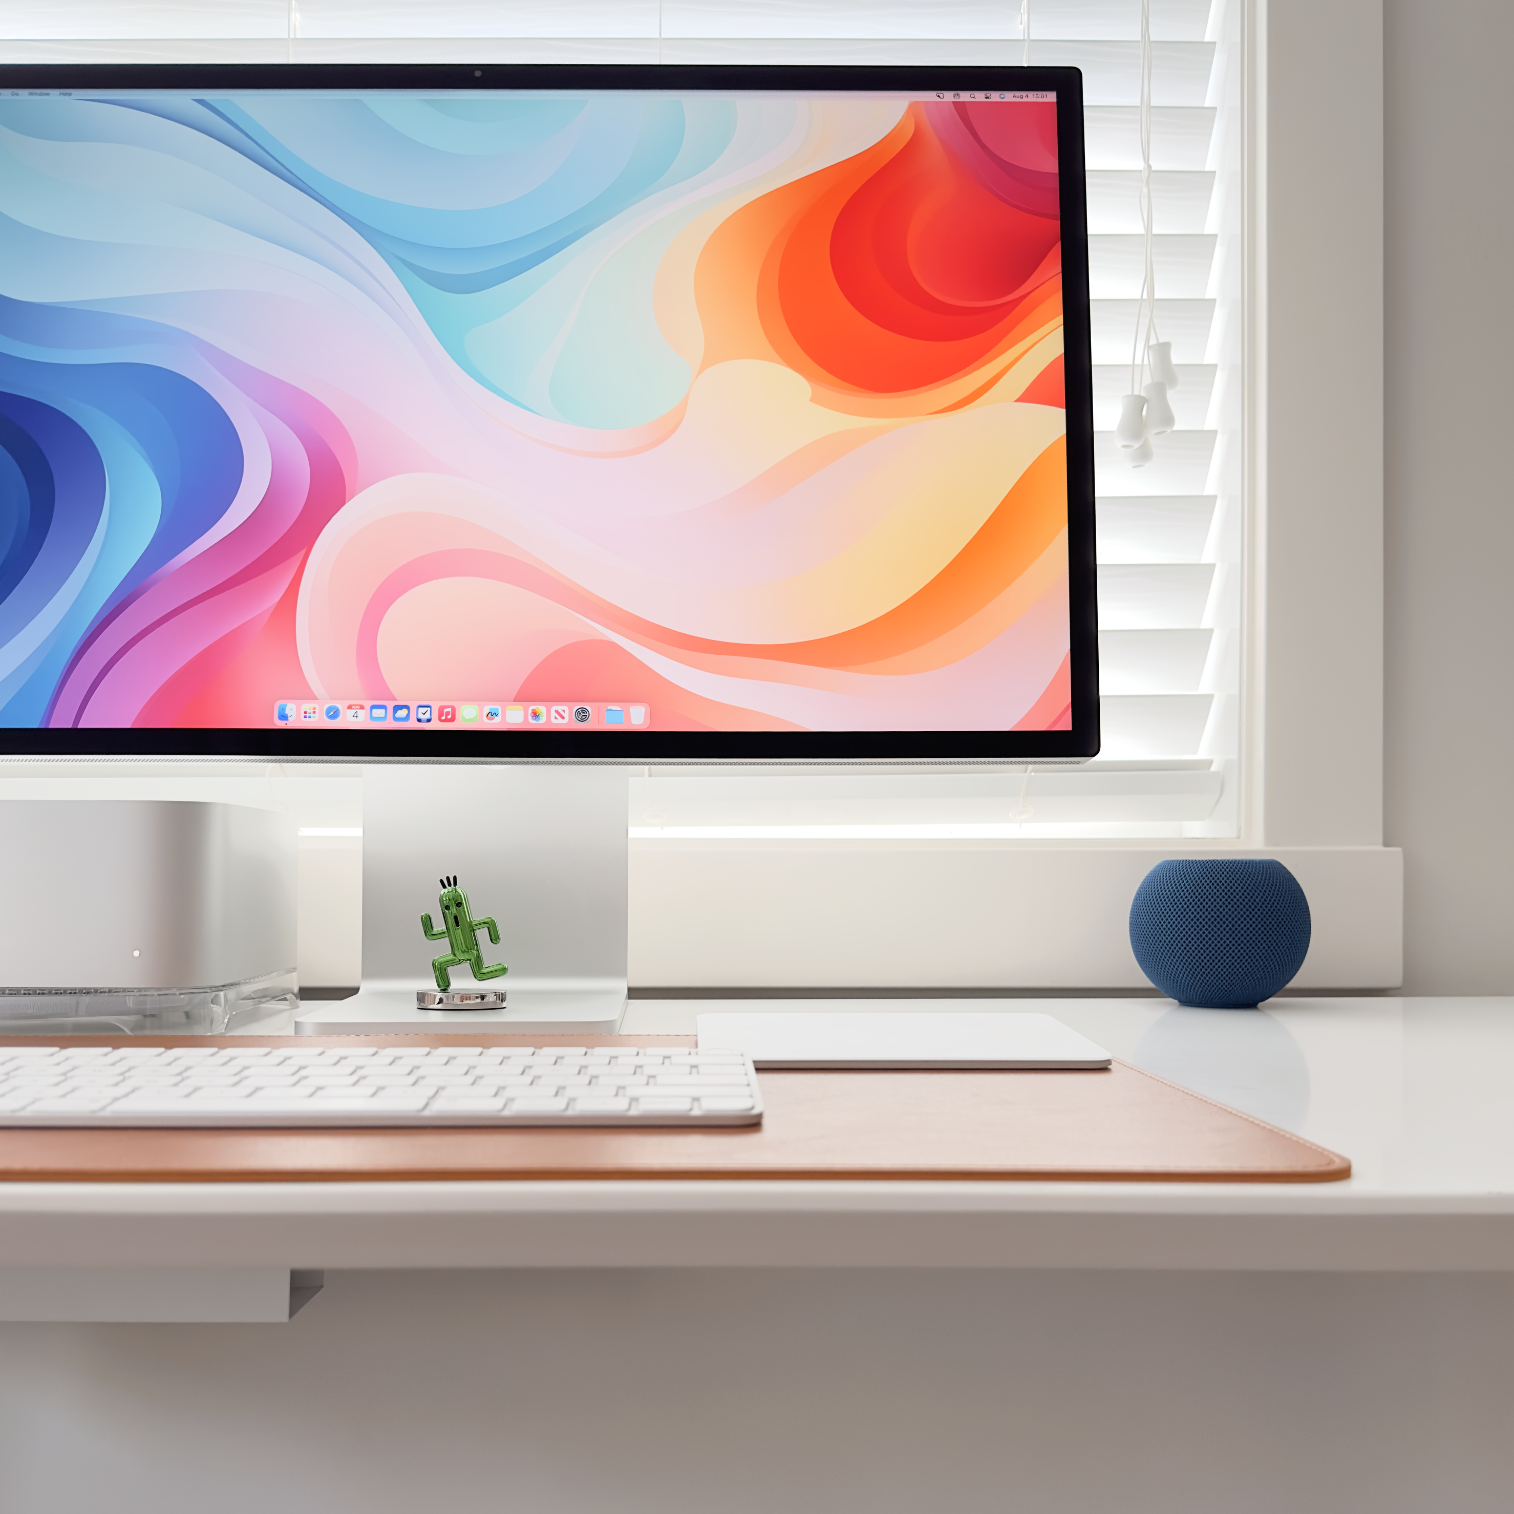
What items do you have on your desk? I'm always being asked about the mat; it's a Satetchi Eco-Leather Deskmate in brown ($39). The other items include a Cactuar from the Final Fantasy series which can be purchased at the Square-Enix online store ($29) & the Mac Studio is being elevated off the desk by a Mac Studio Stand from Spigen ($69). Everything else is stock Apple: Magic Keyboard, Mouse, Trackpad, two blue HomePod minis, and Mac Studio and Studio display.
The cable organizer? VIVO 17-inch cable management tray from Amazon ($36)
Wallpaper? A quick and dirty Midjourney creation. Available in the Haberdashery on August 09.